Mercy Hill Farm Barn Remodel 2020

This is the front of the barn at the beginning of summer 2020. The siding had become unsalvageable and the glass panes were falling out of the window sashes. Worse yet, the paved driveway was installed right up against the siding, which rotted out the siding, the interior wall boards, the sill and much of the bottom 3 to 6 feet of the frame posts.
exterior water damage and rot
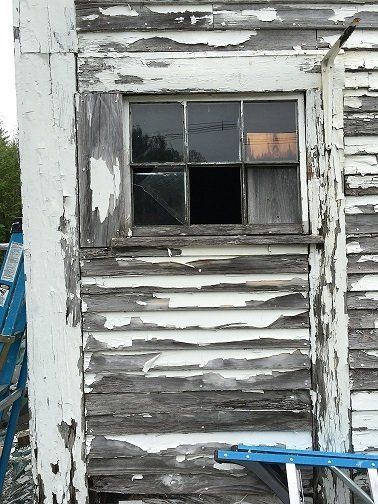
This section used to be a door, then they sided it and put in a kitchy window.

The bottom left corner was trashed from water damage.

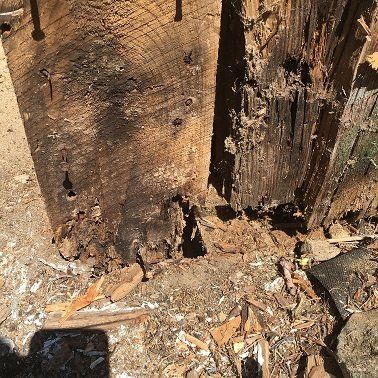
Removing the siding where the asphalt butts right up against the wooden wall reveals a terrible mistake. Because of the asphalt being poured right up against the wooden wall, the entire lower 3 feet or so of the barn was destroyed by water damage.
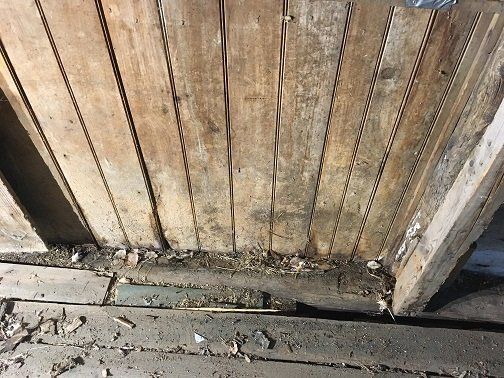
Whomever poured concrete for the door threshold poured it right around a wooden beam which was so rotted you could kick it apart.

The interior walls were a hodge podge of scrap boards, many of which also were dry rotted.
The floor had gaps and holes and inch or two wide.
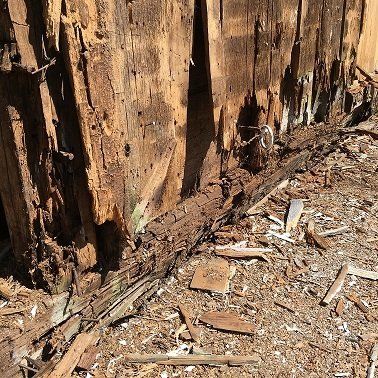
As we pulled back the siding, things got much worse.
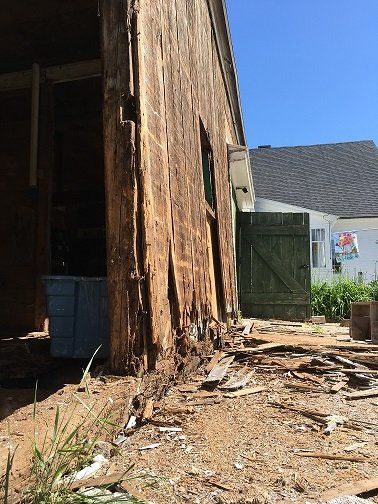
and it wasnt just the wall boards...

upright posts and sill were punky and rotten too.
the "floors"
I use this term loosely. These were floors, in an academic sense I guess.
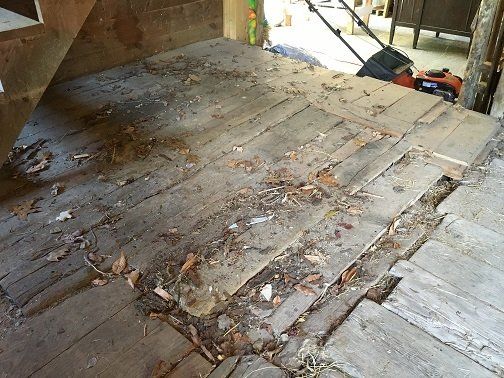
The floor had 4 to 7 layers of half-rotted boards, overlapping in various directions, from spurious attempts at repair over the years.
The uneven board heights and gaps not only looked like hell, but made it dangerous to walk on, and really difficult to roll any kind of power equipment around.
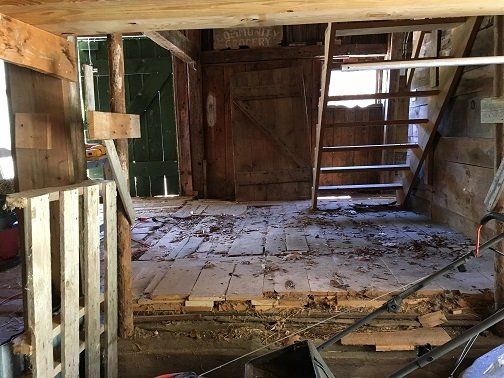
demolition
The siding came off fairly easy.
The overhang above the door took forever to remove. I can only deduce that carpenters back then were paid by the nail, because there was a 6 inch spike every 3 inches holding that thing on.
restoration planning
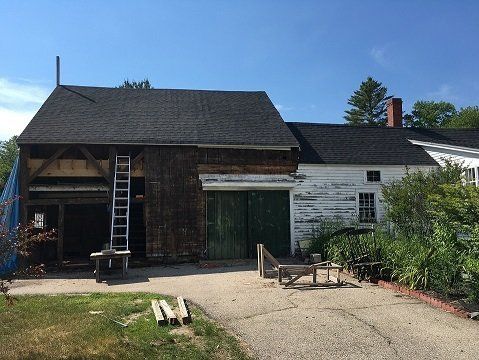
The barn and attached workshop partially demolished.
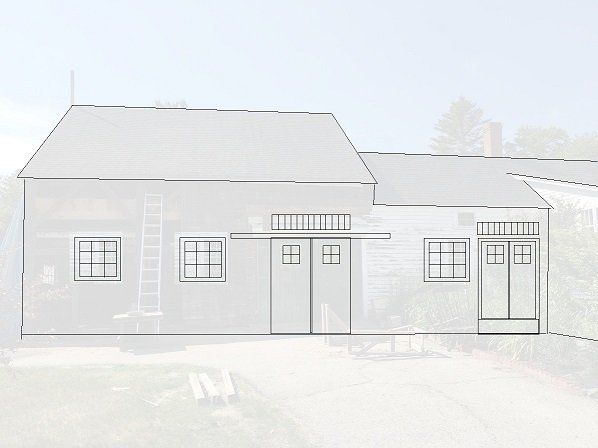
I faded the picture and made a wireframe of the new layout we want, adding some symmetry and more windows to brighten things up inside.
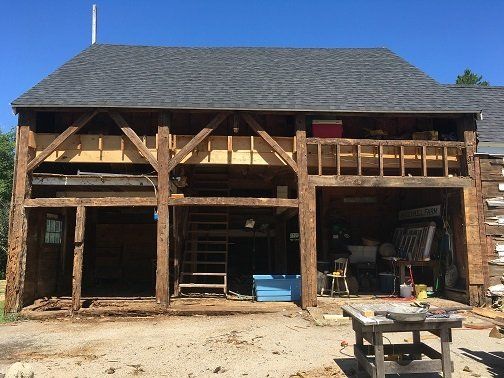
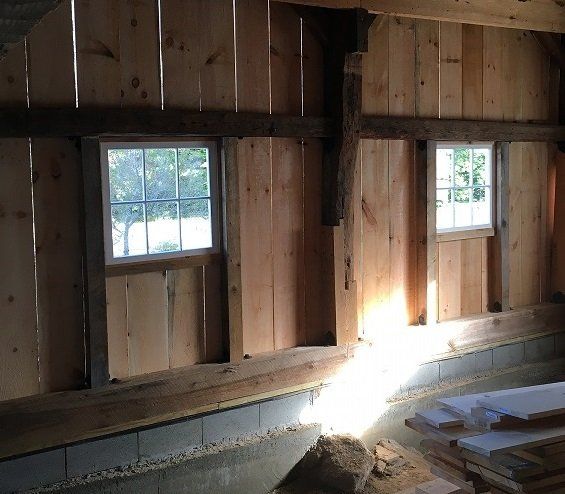
Once all the wall boards were removed we could see the beautiful old hand hewn eastern white pine post and beam frame. The fact that it was still standing, despite every post on this side being rotted 2 to 3 feet up is an incredible testimony to the early craftsmen who built the original barn.

The workshop frame was a bit more eclectic. It was solid but in order to put the windows in the right places, most of it had to be replaced.

This view from the inside shows the frame modified to accommodate the square window centered and symmetrical.
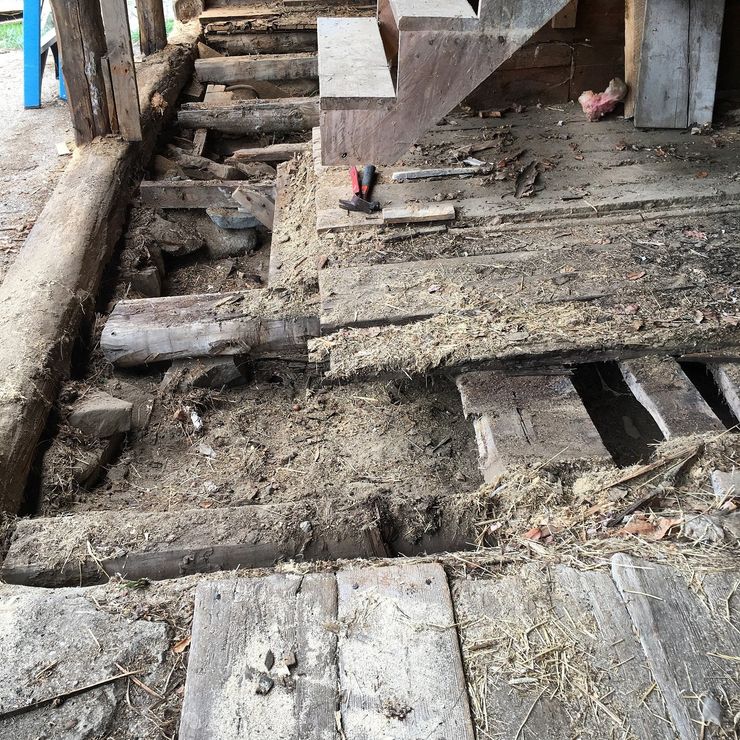
Under 6 or 7 layers of "flooring" the support joists were completely detached from the rotted out sill.
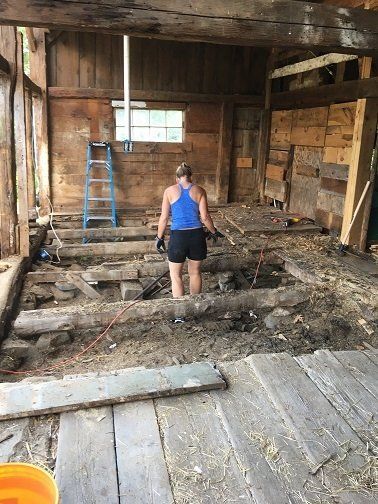
The floor was the most difficult part of the demo.
Layer after layer of boards were nailed together with rotted wood in between. When you try to pry one layer away from another, the pry bar would just sink into the rot. Finally, we had to cut each section away a little at a time with a long bladed reciprocating saw.
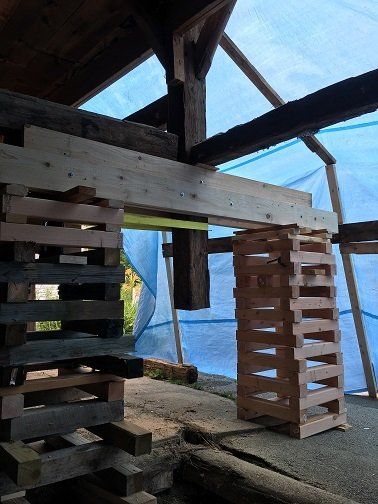
jacking up the support posts

The bottom 2-3 feet of each post needed replacing. So we used bottle jacks and cribbing to jack up and support each post, so that we could remove and replace the rotted sections.
repairing the support posts

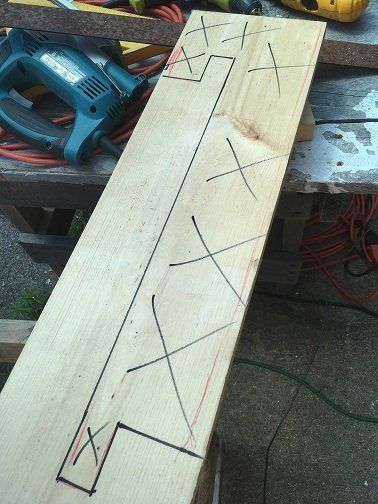
In order to join a new section of post to the old, I cut a double-bladed scarf joint into each original post.
Then we traced the joint's contour onto a template, so that we can cut a fresh piece of hemlock post to match.
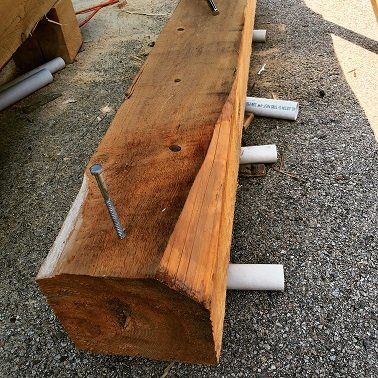
So how does one move an 8"x8"x16' timber around all by oneself, without a tractor? I added a lag bolt for a handle and rolled them around on several pieces of 1 1/2" PVC pipe.
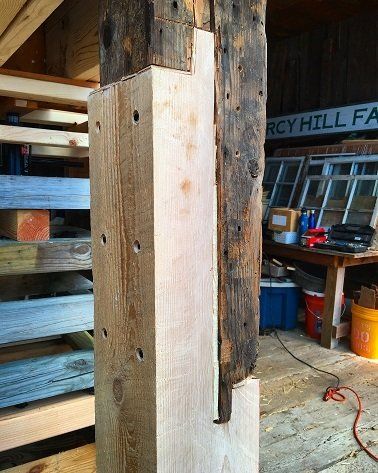
The joined pieces needed a little shimming, but resulted in a nice tight fit that wont twist or buckle.
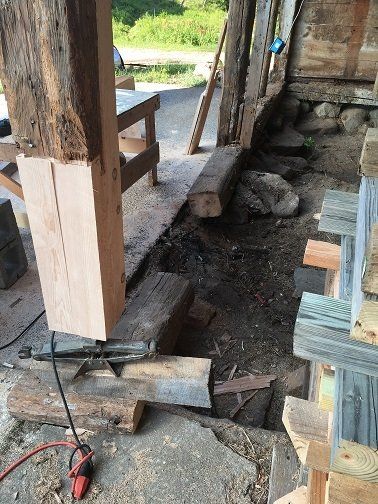
Now with the post repaired, we start to remove the rotted bottom sill underneath. It's 20 feet long and 10"x10", so we cut away a little at a time.

Temporary post support, while we remove the rest of the rotted sill.
replacing the fieldstone foundation
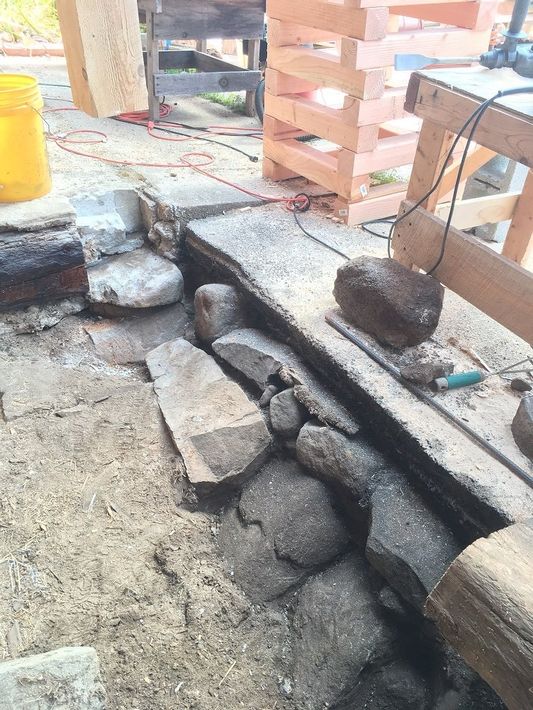
The sill was supported with fieldstones; pretty typical for construction this old, but not exactly what I want to support the new sill and repaired posts. Some were small enough to muscle out of there, others, not so much. Some were also tucked halfway under the asphalt as well.
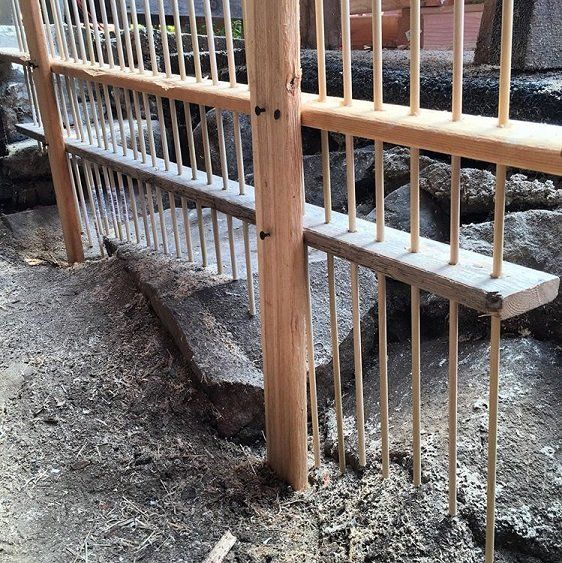
In order to build concrete forms around the larger stones, I made this feather board out of 1/4 inch dowels to capture the irregularities, then I transferred the shape to plywood and cut it with a jigsaw to fit nice and tight around the big immovable stones.

Plywood forms contoured to the stones, supported with rebar and rebar driven into the stones as well, to add stability to the foundation.
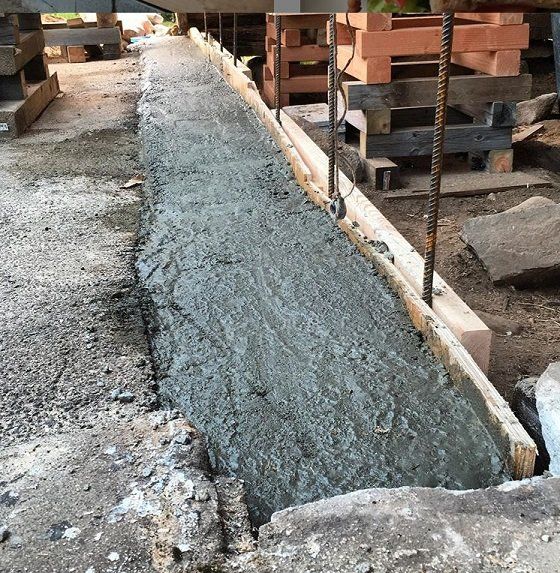
36 #80 bags of concrete brought the new foundation level with the asphalt driveway.
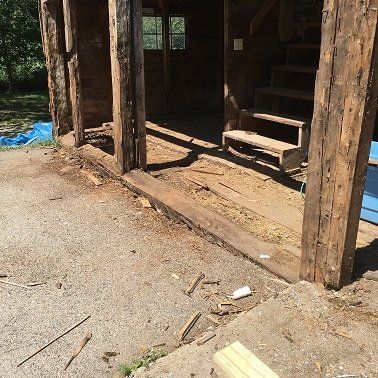
Here's how the old sill looked. As you can see, it was sitting half way below the level of the asphalt driveway.
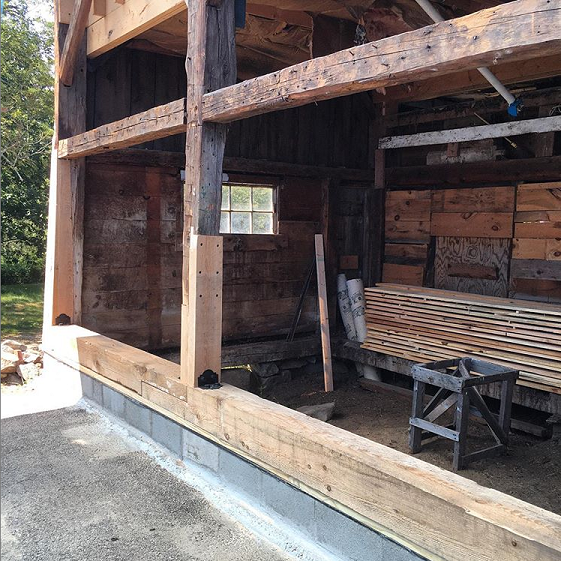
This is the new sill and repaired posts supported by concrete, well above the ground level.
walls and windows
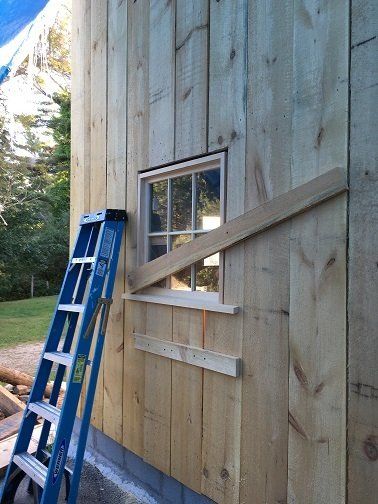
We installed three custom built square single sash windows, two in the barn and one in the workshop. We wanted them all to be the same size for symmetry.
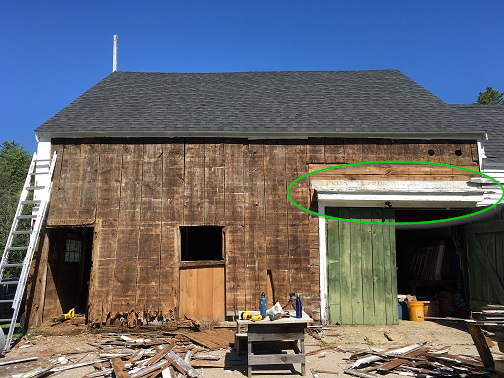
This lovely transom window we installed above the barn door.
..and a second smaller one over the workshop door.
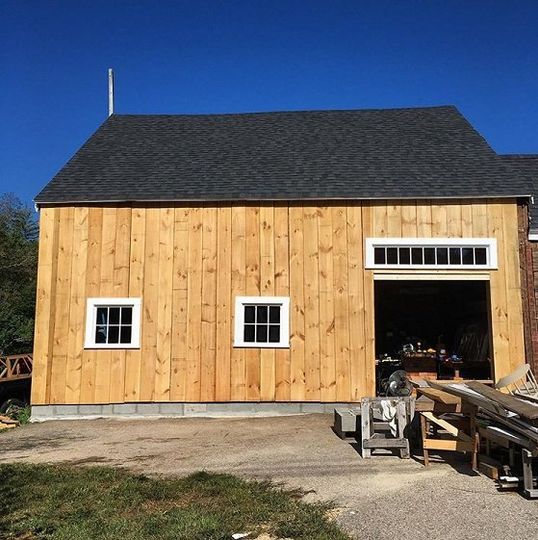
2400 square feet of beautiful rough cut eastern white pine.
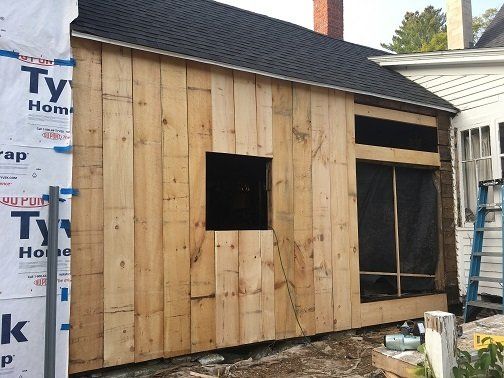
Workshop wall boards to match.
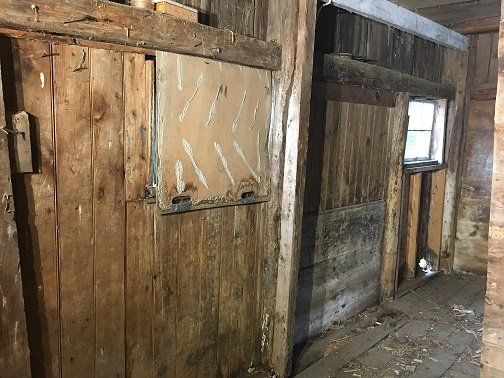
This was the barn's inside wall prior to the remodel.
and now.

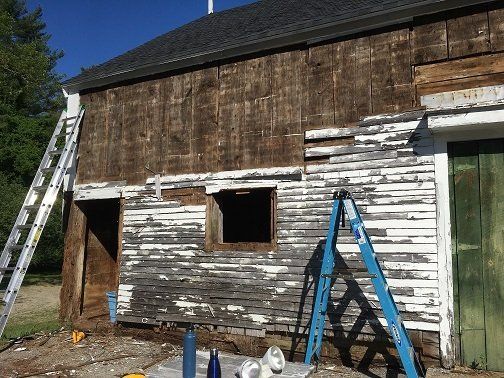
We hung homewrap for a moisture barrier, trimmed out all the windows and edges and then started installing some pre-primed bevel siding.
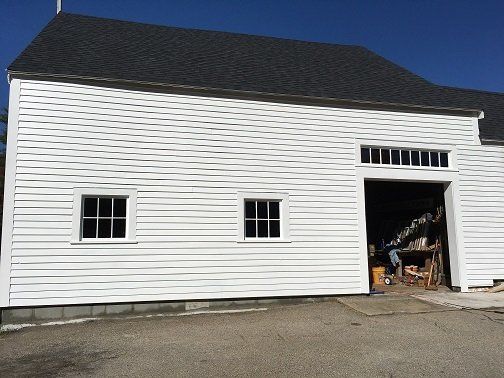
Two coats of bright white latex paint. Aint that something.
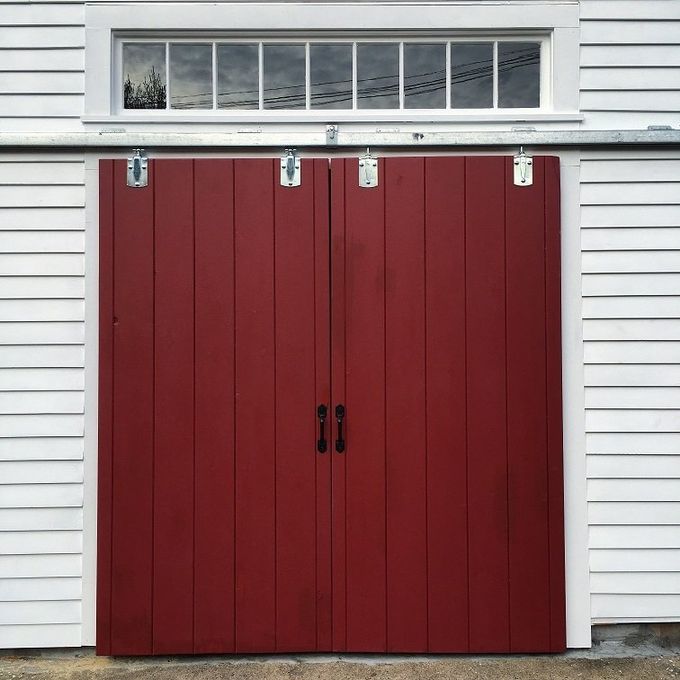
Double hanging doors; barn red of course.
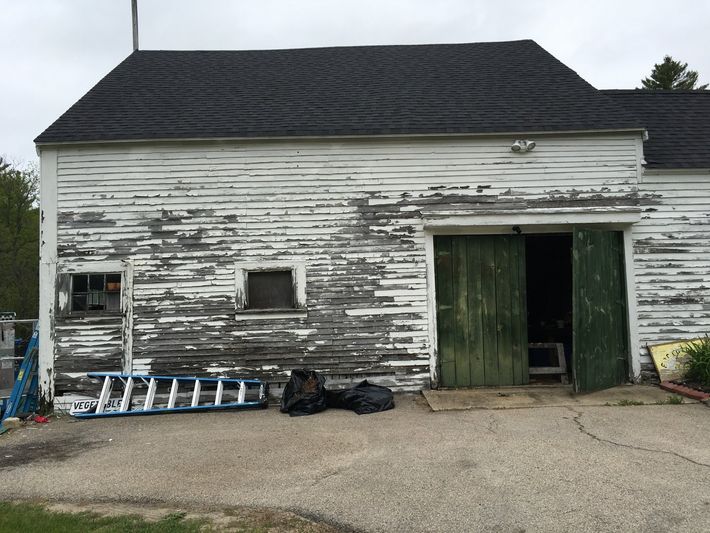
Falling down and abandoned looking.
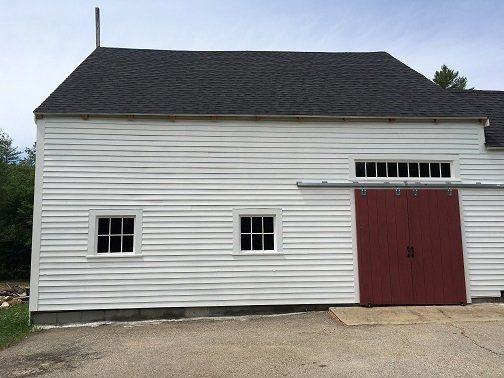
Restored - all good for another 200 years.